Tuesday, July 29, 2008

Candy Bowl Tutorial & Free Images

I will be coming back with a new kit and brag book pages set soon. It's a kit based on duct tape, great for all of those photos of the men & boys.

The tutorial below is to make this bowl. For those of you who want it, you can download the bowl and candy HERE. This zip contains an empty bowl and a full bowl, both as png's.
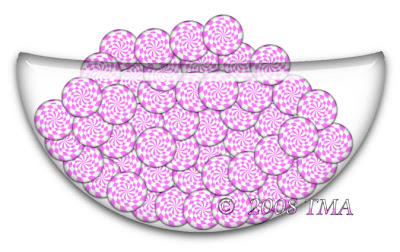


Candy Bowl Tutorial

Download a zip containing a png of the bowl outline I used HERE and open it.

You do need a working knowledge of psp and need a copy Eye Candy 5 Impact for the glass. I'm sure you can probably try other methods to make the glass. For this tutorial I chose EC 5 Impact


Open the Candy Bowl Outline png, using the magic wand select the inside area. Add a new raster layer.


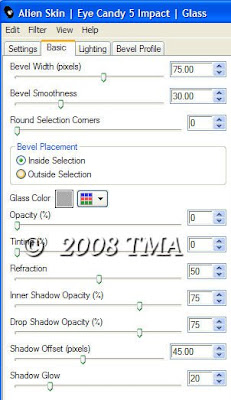
While on the new layer go to, effects>EC Impact>Glass and select Clear Glass from settings menu. Go over to the next tab marked Basic and check the settings to match mine in the image here. You can play around with the settings, if you want. You can even make the bowl a different glass setting. Your choice. If you make it a dark glass, you might have to lower the layer opacity to see the candy thru the bowl.


Go to select none and then delete the layer with the bowl outline and save this bowl as a new image. Save as a png if you want to stop here or save as a pspimage if you want to fill the bowl.


Filling the bowl basically consists of copying a candy to a layer beneath the bowl layer. Resize to make the candy look proportionally right to the size of the bowl. Duplicate this layer and move the candy over to the side some. Keep duplicating layers and moving until you have enough to make the bowl look full and have some coming out of the top. You may have to turn off the bowl layer to grab the candies to move them. Occasionally turn the bowl layer on to make sure your candies are staying inside the bowl. If you have strays outside the bowl edges, just move them back. When you are done, save first as a pspimage to have it to use later for other projects, maybe filled with different candy. Then merge layers and save as a png to use in your scrap project.
Any questions, please email me SusieQ's Email
I try to explain these projects to my best abiblity but remember, I am not a tut writer. I will go over any part you don't understand.


Monday, July 28, 2008

Peppermint Candy Tutorial & Freebie


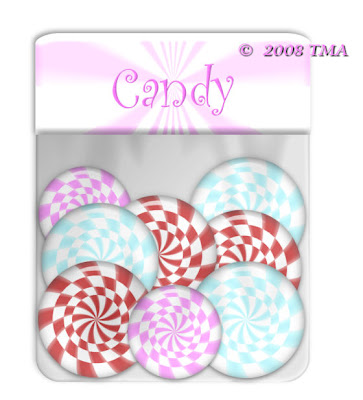
I don't write tutorials alot but wanted to share this with the group I belong to, so here it is. For those of you who don't feel like trying the tut, HERE is the link to download the bag of candy image below. The zip has the bag of candy in pspimage format, because there is layers in this.


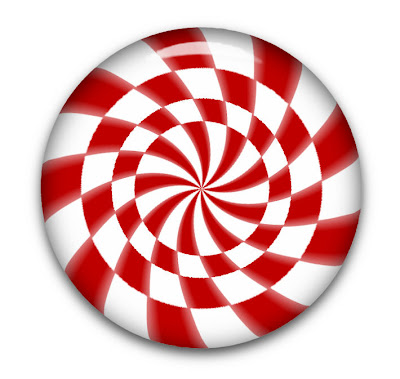
Peppermint Candy


Open a blank canvas 900 x 900, 300 dpi. I like to make mine big then resize
smaller if needed. Download my tut supplies HERE. In the zip is 4 gradients for candy and a pspimage with the 4 circles and a black background, to see the white circles better. If you use mine, delete the black before merging layers.


If you want to make your own circles, do the step below. If you use mine, skip to the next step.


Set foreground to white, background to null, choose shapes tool, make a
circle, holding shift key to keep it's round shape. Make it about 600 pixels
across. Objects>Align>Center of canvas. Duplicate the circle 3 times for a
total of 4, resize each layer by 75% uncheck resize all layers.


Select inside of circle in bottom layer with magic wand, add a new layer and
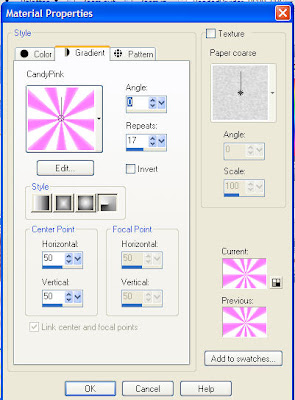
fill the new layer with the gradient Candy set with Radial at 17 repeats. Select
none and hide circle layer. Do this for the other 3 circles, making sure the fill
layer isn't with the circle as the white circle will throw off the look of a
peppermint candy.


When you have 4 layers all filled, now we do the twirl.
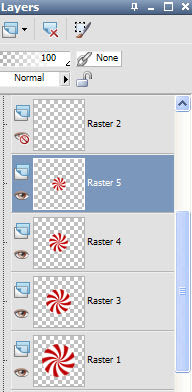
Effects>Distortion>Twirl and set the degrees at 60. Do this to all 4 layers. 2
of the layers need to be rotated so I rotated raster 3 and raster 5
Image>FreeRotate, 20 degrees to the right, make sure the all layers box is
UNchecked. The photo of the layers just shows you which 2 layers I am talking about to do the rotate on.


Merge all 4 candy layers and use EC5 Impact>Glass>Clear default settings. I know it gives you a shadow around the edge but I like this glass looks better than the settings for Clear, No Drop Shadow. You can play with the settings for this.


I hope everyone enjoys this little tutorial I wrote. Please email me if you have any questions


Wednesday, July 9, 2008

Back With A Huge Freebie!!

I have come back with a huge freebie kit! I did the great color challenge over at DSO and it always inspires me to create alot. I love those challenges they do!

Download links are at the bottom of the post.


Til next time--stay cool, take care & happy scrappin'!!!